


Disclaimer: On a scale of 1-10 (1 east, 10 hardest) this job ranks a solid 7 for me. Oil change ranks a 0. Clutch ranks a 9. This is NOT for the timid or the first time wrench turner to tackle alone.
List of tools NEEDED
10mm socket (deep and shallow)
12mm socket (deep and shallow)
14mm Socket (deep and shallow)
17mm Socket (deep)
22mm socket
1/4", 3/8" and 1/2" driver ractchet/breaker bar
10mm, 12mm wrench
3/16" allen wrench
Phillips and flat screwdriver
Jack with a high lift
small 2x4
jackstands
hammer (always need a hammer!)
Tools recommended
1/2" impact
3/8" air ratchet
angle grinder with brown disc
air compressor
First off, get the front of the car in the air and support with jack stands on the lift location on each side. Use the front crossmember/tow hook to lift from. REmove the passenger front tire, the inner plastic shield (2- 10mm bolts) covering the engine annd crank pulley (do not discard, MUST be reinstalled). Remove the orange plastic plug in the driverside bottom of the radiator to drain the radiator of coolant.
Take the 4 10mm bolts off teh upper timing belt cover and remove the cover. Put the 22mm socket on the crank bolt and slowy turn cloxk wise until the cam pulley is lined up like this:
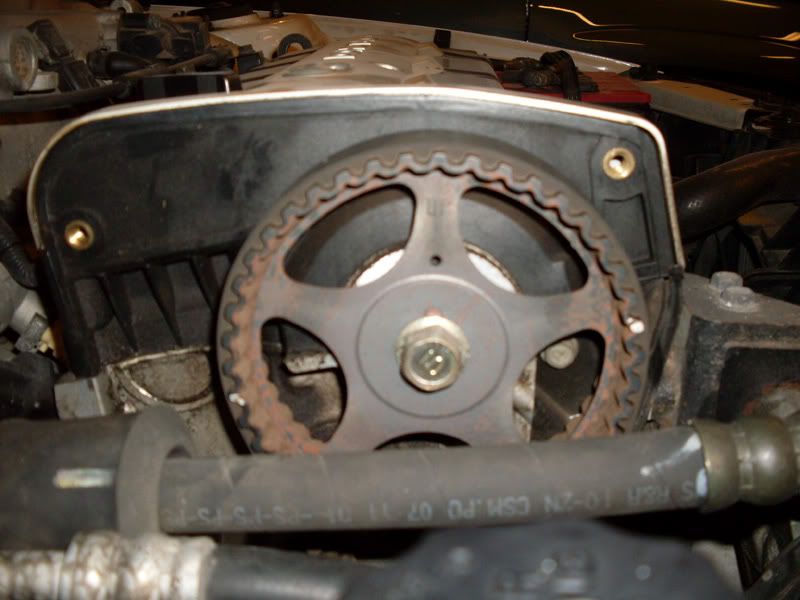
MAke sure the crank pulley's mark is also lined up on the timing tab. It's really hard to see, even more so if your car has lived it's life in the salt belt.
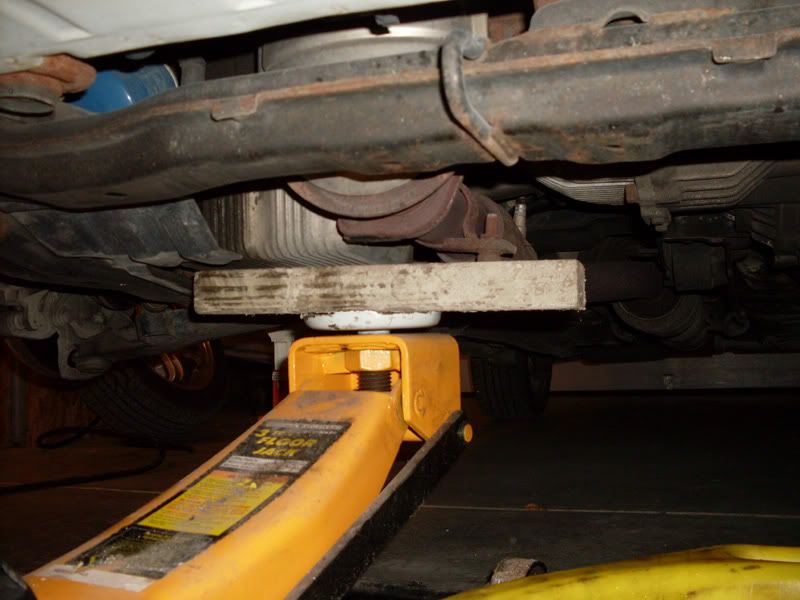
Next, support the engine with the jack, placing the small piece of wood between the jack and the oil pan. This will be uitilized to raise and lower the engine to access bolts as you go, so make sure its stable as it will be the main thing holding the end of your engine up.
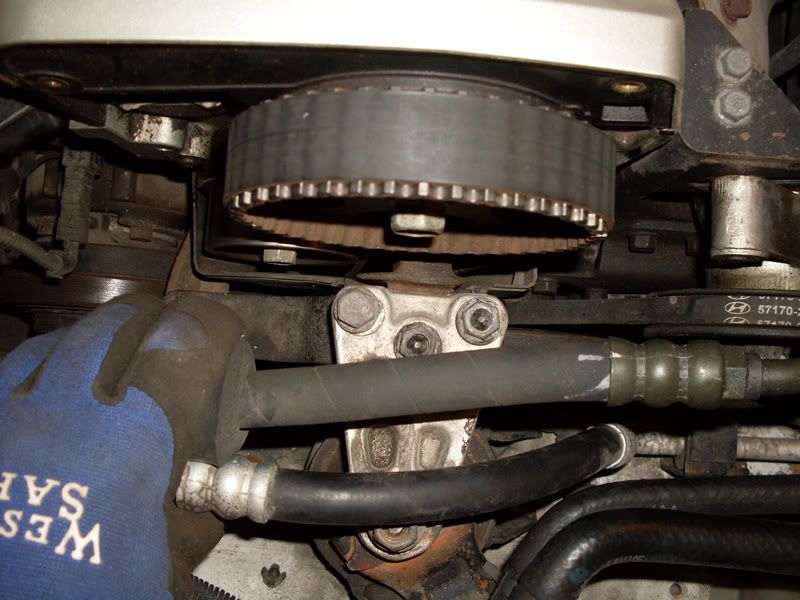
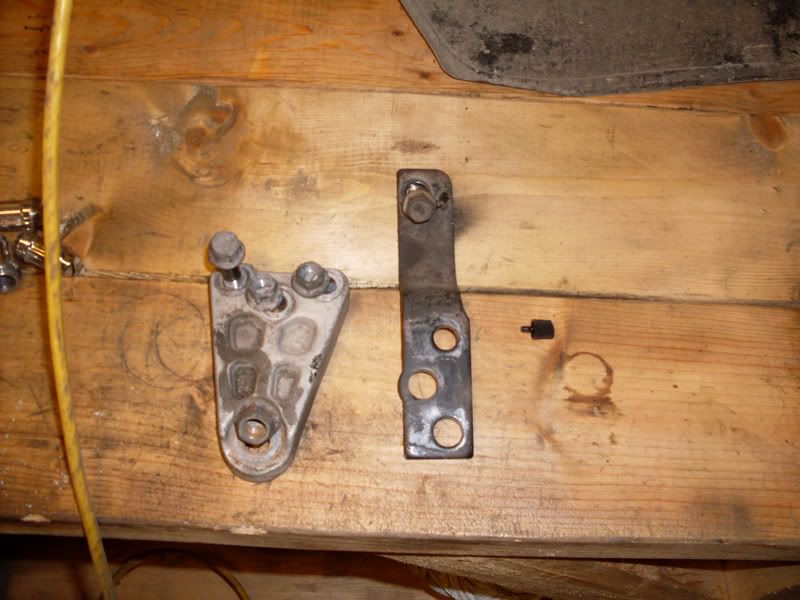
Next, loosen and remove teh 17mm Nut, the 2- 14mm nuts and the 14mm bolt holding the alumin "A" shaped arm from the engine to the side mount and remove teh bracket. IT should look like this:
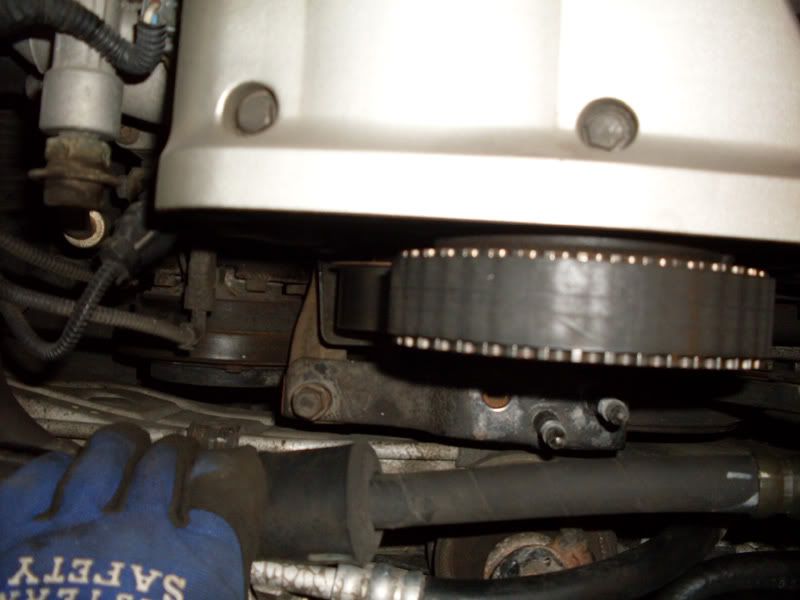
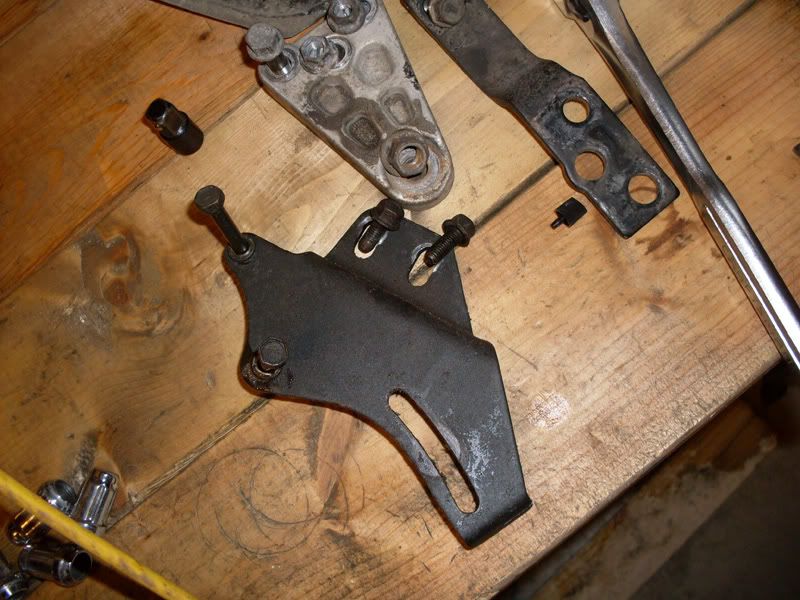
Then remove the 14mm bolt holding the support bracket and remove the bracket as well
Both brackets look like this to help remember where they go and help you find the bolts:
The engine is no fully supprted by the jack and can be manipulated to access the hard to reach bolts.... like the ones you are about to remove. Raise the jack until the engine stops lifting. Now, take your 10mm wrench and break the 4 10mm bolts loose that hold the waterpump pulleys. Do not remove yet, just loosen. The belt tension "should" keep the pulleys from spinning, but additional pressure may be required.
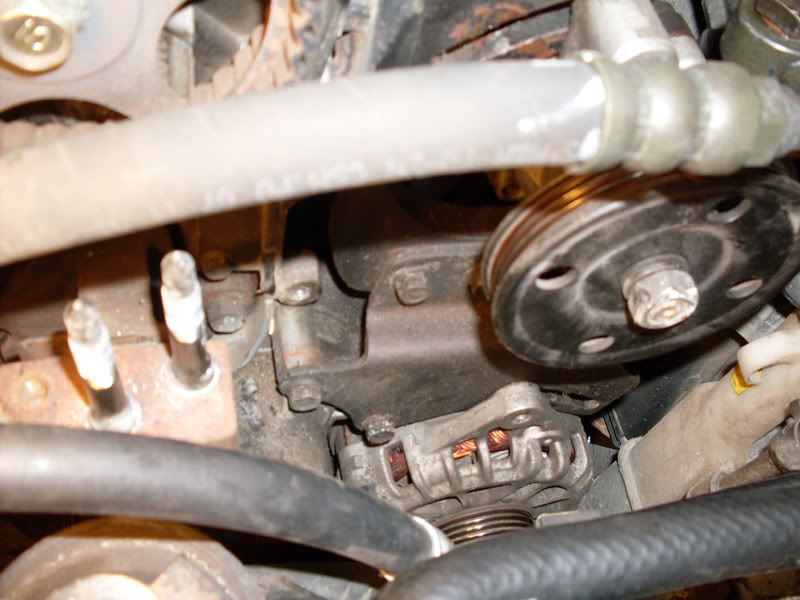
Next, loosen the P/S pump (12mm bolt on the top adjuster), the alternator (12mm bolt holding tension and the 12mm adjuster
 and the A/C tensioner (14mm bolt holding tension, 12mm adjuster)
Remove all 3 belts. set off to the side to compare with your new belts before reinstalling.
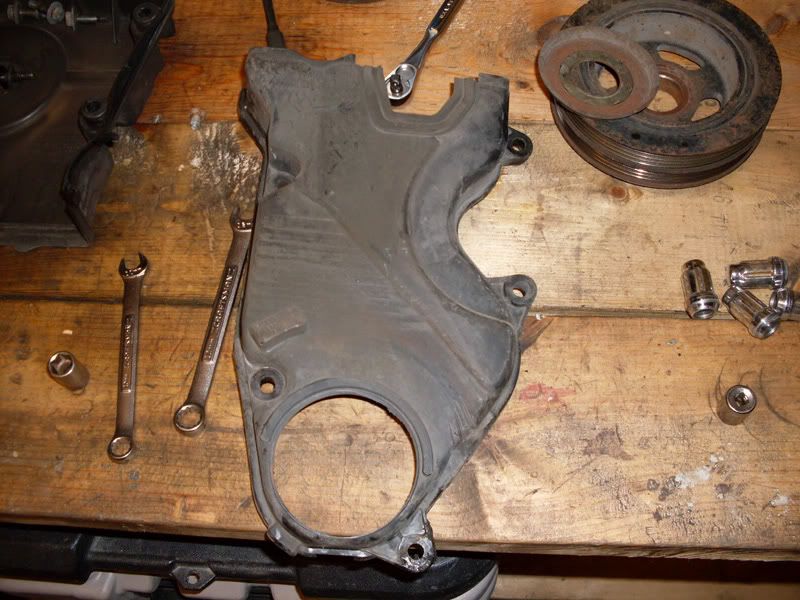
Next, remove the 4 bolts holding the waterpump pulleys on and remove the pulleys. Not the direction they came off to reinstall later. remove the crank bolt with impact. Then, using a 2/3 jaw puller remove the crank pulley. DO NOT use pry bars to pry it off. This extra pressure on the thrust bearing could lead to early engine failure. Once the pulley is off, remove the washer behind it and then the 5 - 10mm bolts holding the lower cover. REmove the cover (it sucks.... no easy way other than flexing it past the pulley and bracket). here's the cover to help in finding the bolts:
Next, loosen and remove the large center bracket that holds the mount arm (this is optional, but makes access to the w/p MUCH easier).
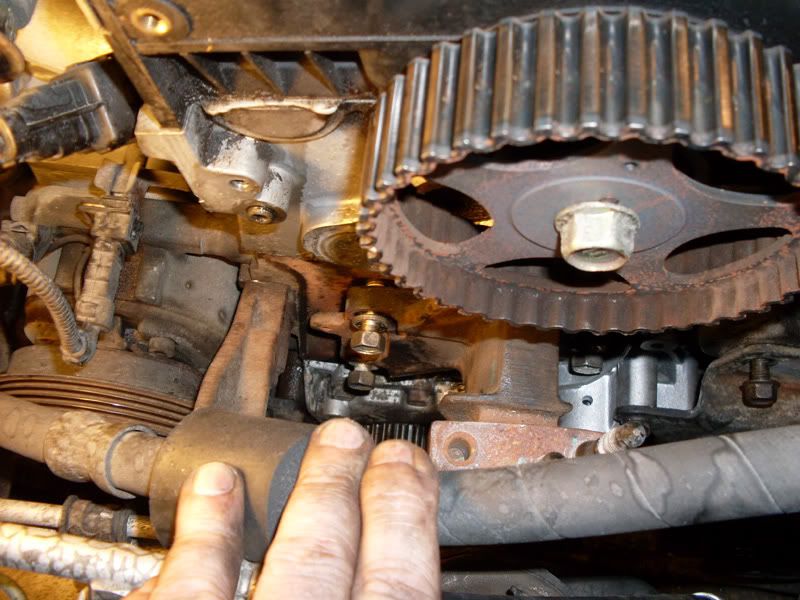
Then loosen the timing belt tensioner (14mm bolt), the idler (14mm bolt) and the timing belt.
NOTE: The engine cannot be moved at this point. Bumping the starter or turning the cam will result in the timing being off. THis can lead to bent valves on start up
Next, remove the 4- 12mm bolts holding the alt bracket to the block/waterpump and remove the alt tensioner and set off to the side.
Remove the last 3 bolts holding the waterpump to the block. You will likely have to pry/bump the waterpump loose at this point as the gasklet and sealant are holding it to the block. Once removed, clean the surface of all sealant and gasket material leaving only the bare block.
Once the surface is clean and dry, apply a thin film of Grey RTV to the waterpump, lay the gasket onto the rtv and then apply another thin layer of RTV to the block side of the gasket. This will help seal any differences between the two mating surfaces and keep you from needing to remove the whole assemly and do it again (did that on my first pump years ago). reinstall pump and allow the RTV to cure for at least 30 minutes before adding coolant. Reinstall the alt bracket and make sure the alternator adjuster and alternator are lined up before tightening any bolts. Reinstall the large metal bracket (3 -14mm bolts) and the idler pulley.
Now, install the timing belt on the cam gear first, fed past the idler and keeping it tight install onto the crank pulley. Now... if nothing has moved the idler side should be fairly snug and fit well. Now reinstall teh tensioner, and using a 3/16" allen wrench and the 14mm socket tighten the belt. Rotate the engine using the crank bolt 2 complete revolutions (720*) and recheck tension. If tension is correct, continue on. Reinstall the lower cover, the crank washer and pulley, the waterpump pulleys, 3 accessory belts, the metal support arm, the aluminum "A" shaped mount arm, reinstall the radiator drain plug and remove te jack. With the car still in the air, SLOWLY refill the coolant. With the nose up, and slow filling you will eliminate the likelyhood of air bubbles. Thisshould take about 1.5 gallons of pre-mixed coolant. Once everything is full, and tight. Start the car up with the radiator cap off and allow the engine to reach operating temps and add coolant as needed.
This job takes me about 4 hours with the pump, about 2.5 without. This is my 4th. First time around took 6-7 hours and a lot of mistakes.
PLEASE, visit http://www.hmaservice.com and sign up for a free account to get all the technical information I did not include.


