 |
|


  |

 Nov 16 2011, 08:08 PM Nov 16 2011, 08:08 PM
|
|
 Poster Pro Group: Lifetimer Posts: 961 Posts Per Day: 0.21 Thanks Received: 180 Trader Stats: 2 (100%) Joined: 1-September 11 From: Philadelphia, PA Member No.: 11,051 Mood: Full |
Hey guys so as you may or may not have seen in some of my recent posts, I installed a new headunit a few weeks back. It is a 7" touch screen. It's a Power Acoustik PTID-7002NRB. I would recommend this product so long as you're willing to do some custom cutting.
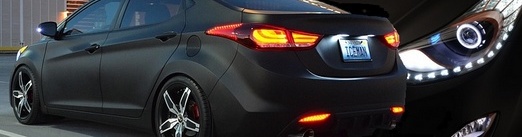
I decided to buy this headunit for a number of reasons. 1) I wanted a new headunit. Simple as that. The stock one somewhat bored me and my subwoofer was only playing at a mediocre level with the line out converter. 2) I wanted a touchscreen. I figured I might as well get something that looked pretty sweet. 3) I was looking for a touch screen that could fit the HD. In the HD there is a plastic bar that runs across as a divider. This makes it only possible to install a single din dash kit (unless you do some major cutting to your stock dash which I wasn't prepared to do). So that meant a full out double din touch screen was out of the question. I also am not a big fan of the touch screens that fold upwards. I think they look awkward personally and I'd be afraid of pushing too hard and breaking it. So I needed one that would fold downwards. There are not many of this type that I could find 4) Relatively inexpensive. It has great reviews and for a touch screen it is a very good price. $235 for unit, dash kit, wiring harness, and three year extended warranty. I figured I couldn't go wrong. So here goes. Caution: If you want to buy this exact unit, be prepared to do some cutting like did (steps shown later on) Finally received the unit: 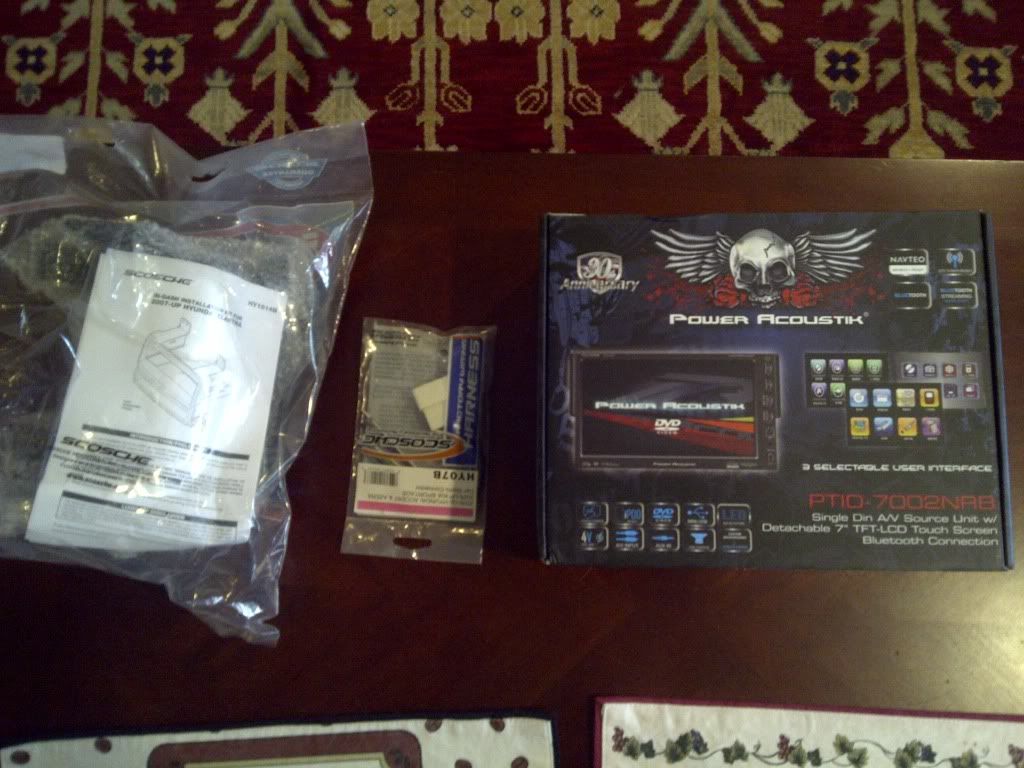 Organize all your tools and accessories. Begin the wiring. Follow all instructions. It's pretty self explanatory. On the harness packet and wiring kit they will tell you which wires do what. They work fairly color coordinated. Simply match up the wires, splice them, solder them, and then use electrical tape or heat shrink wrap. (I used the heat shrink, it's more convenient and tends to hold better) 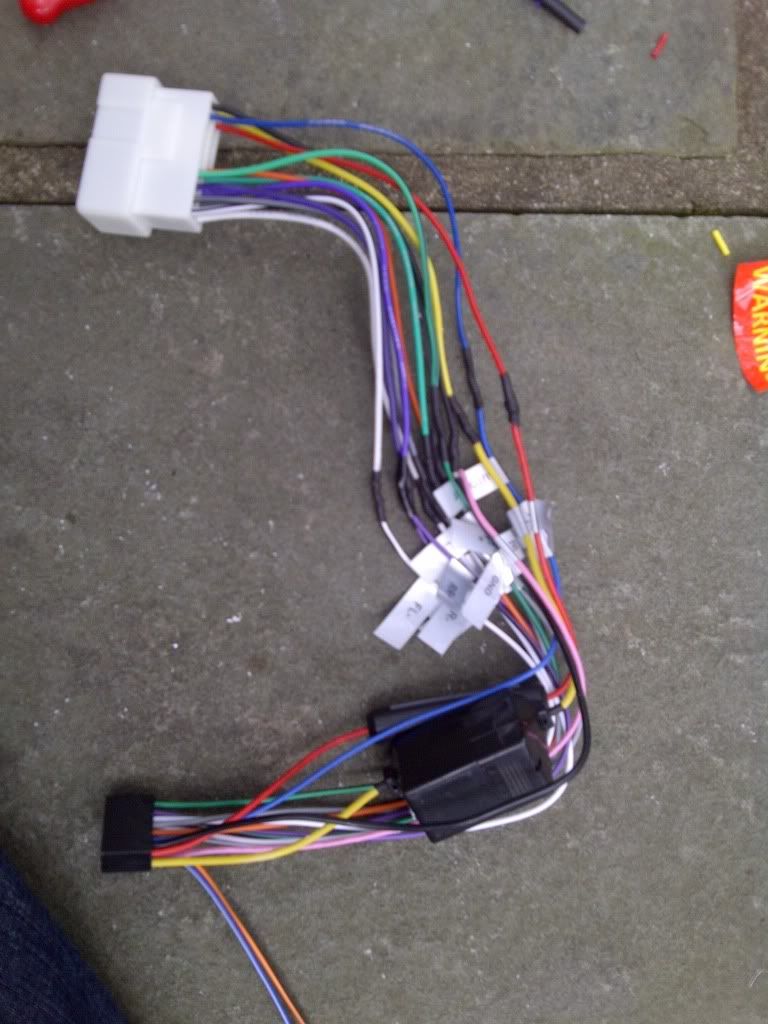 Once the wiring is done, you can begin work on the car. REMEMBER. Disconnect your negative terminal. You do not want to blow a fuse or mess up your electrical components. 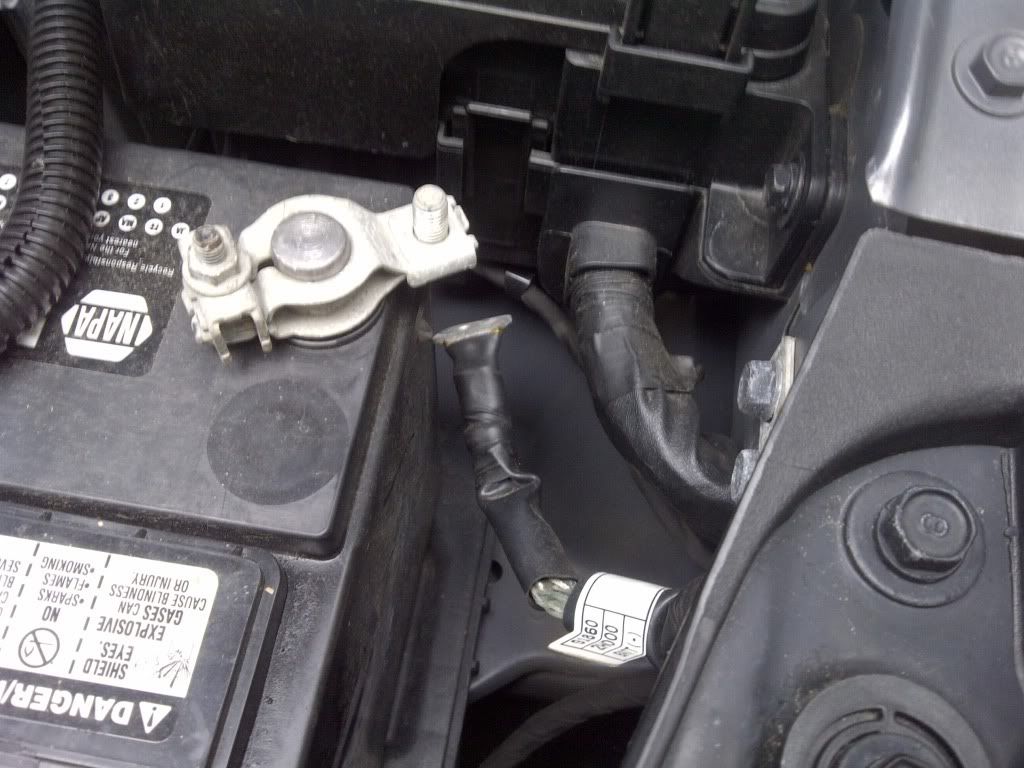 Take off your front dash panel. Insert a screwdriver with light cloth or some other flat object to lightly pry it forward. There are 8 connector pins. For more help with this, follow the DIY on the wiki page. 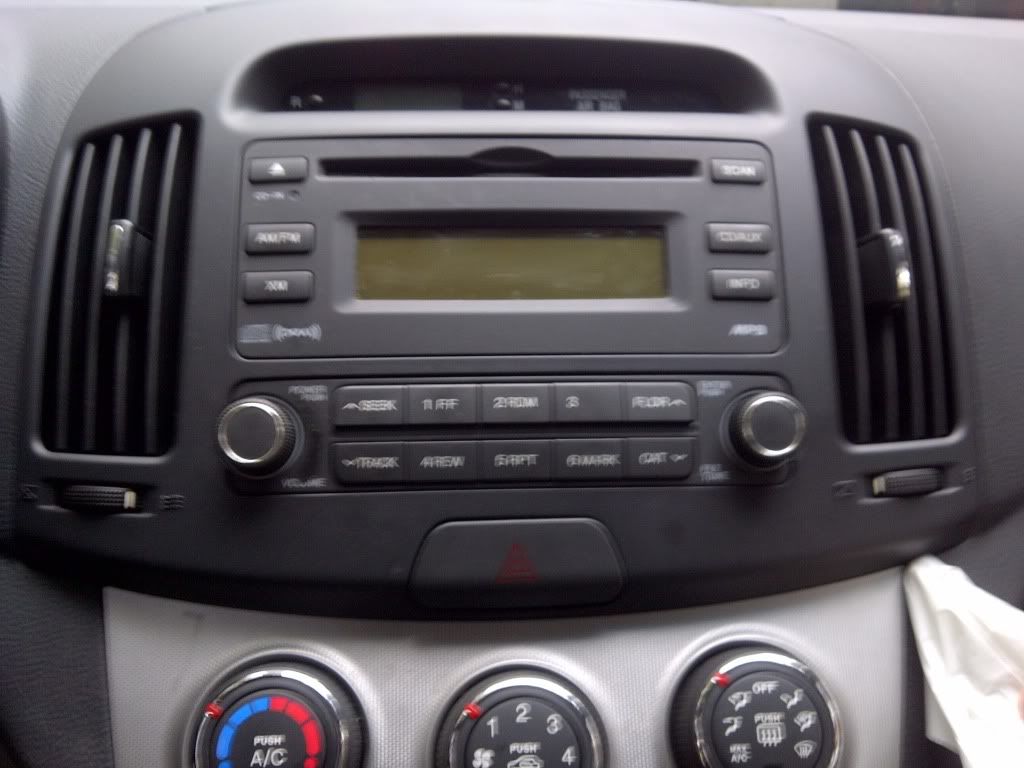 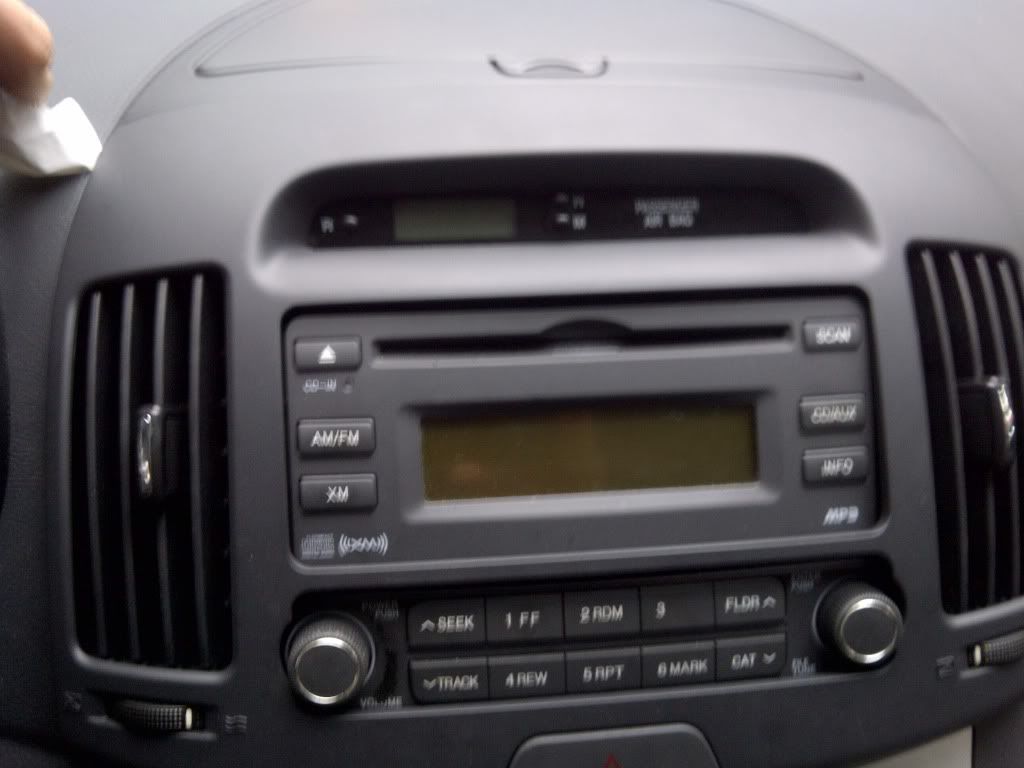 Disconnect the three terminals still holding the dash unit in place. 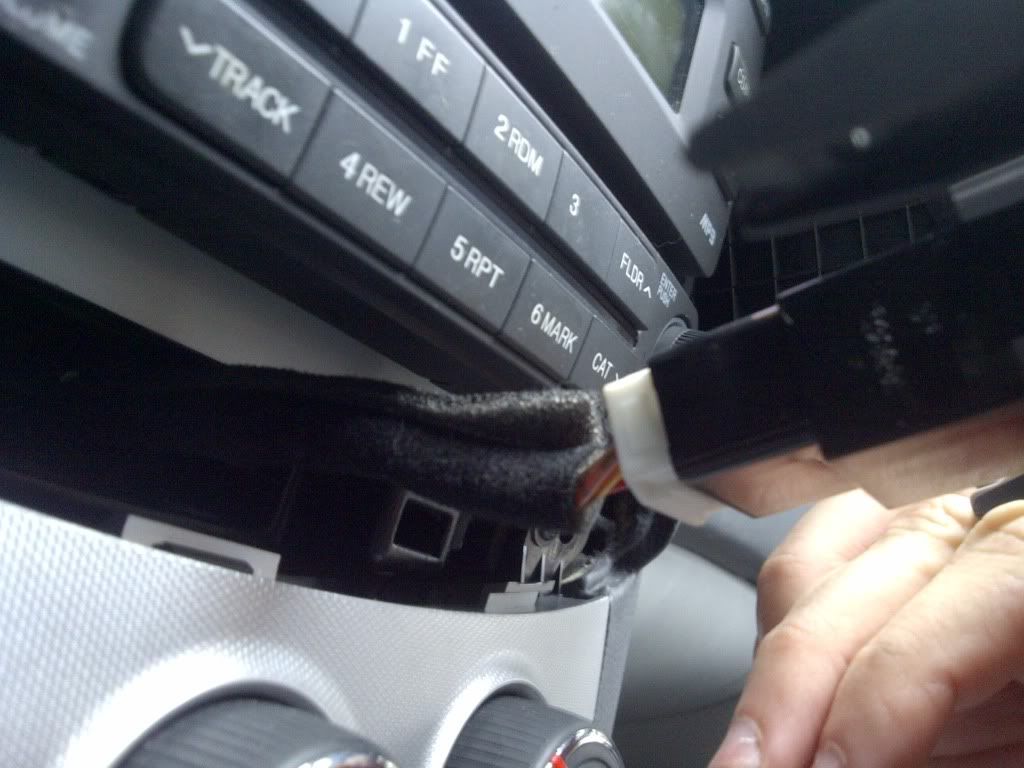 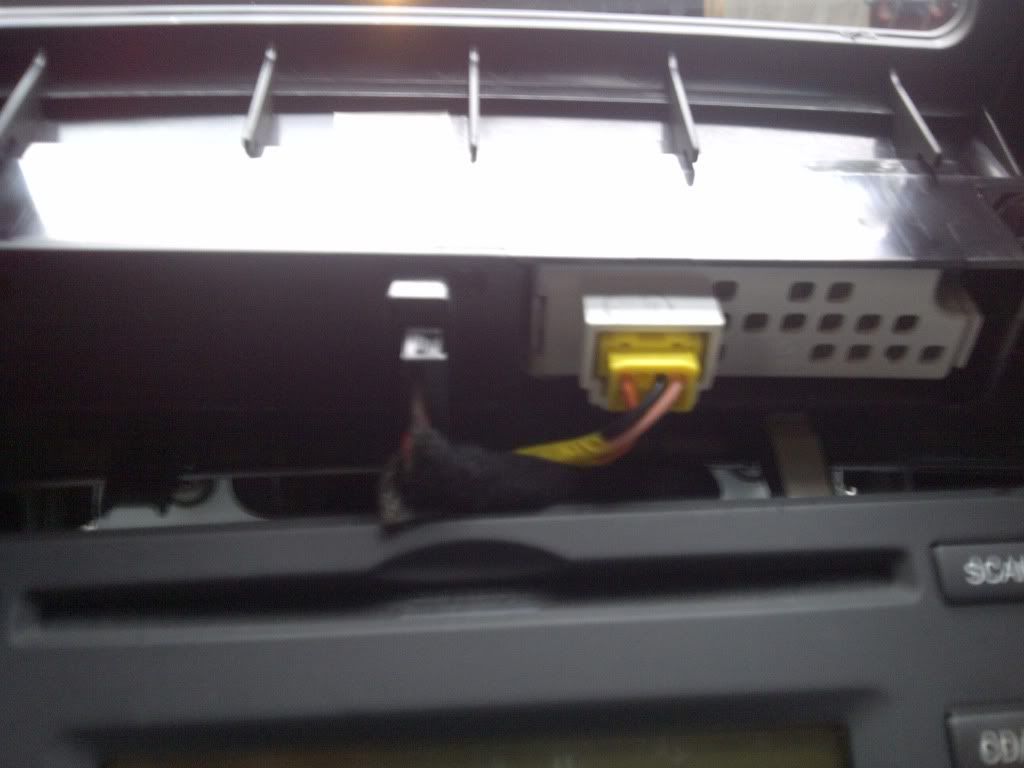 Once the stock unit is free, unscrew the four screws holding it in (in the picture I have already removed the screws). 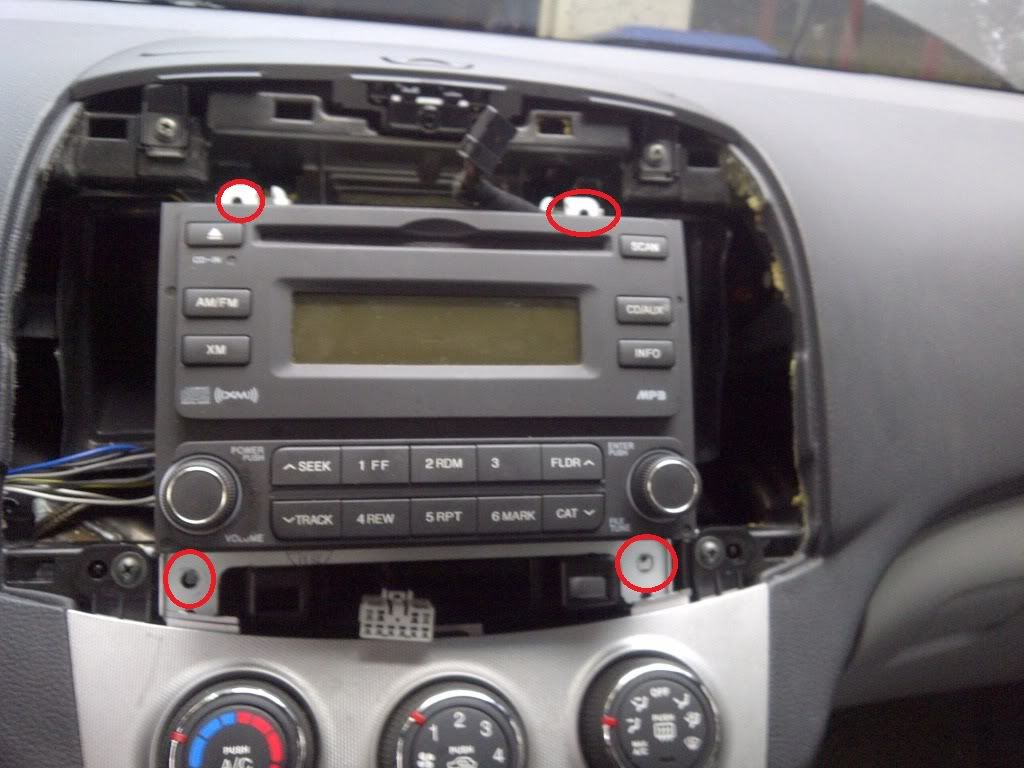 Unplug the antenna and harness and remove the stock unit. 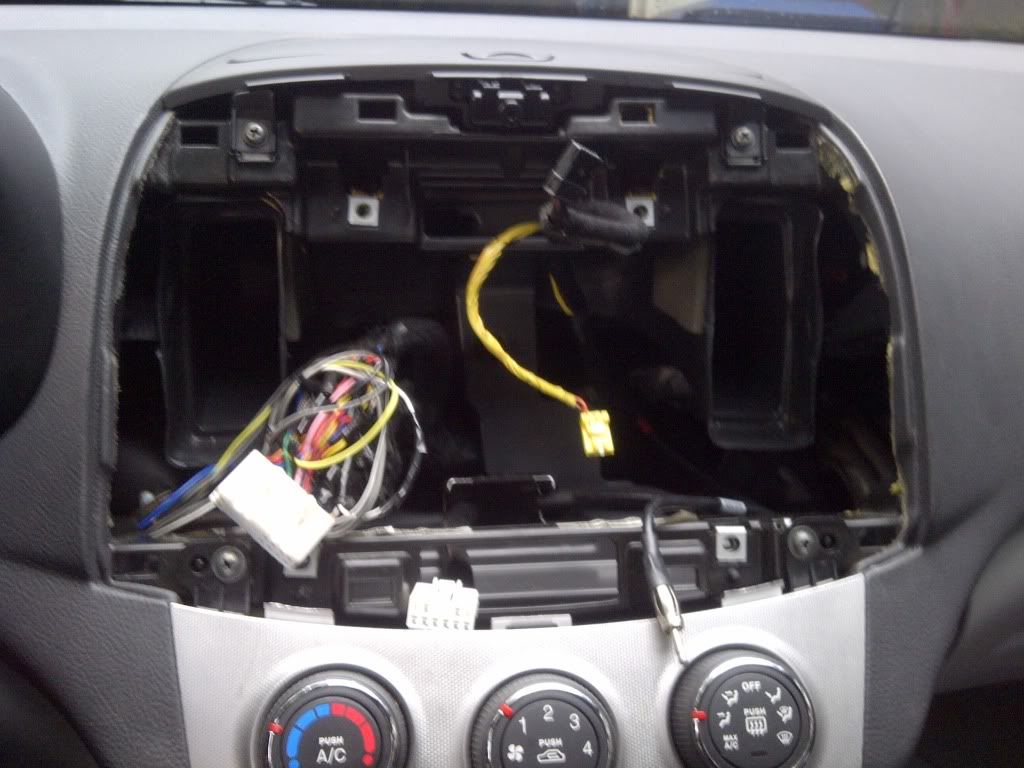 Install your headunit into your new dash kit. Line your screws up and tighten them so your headunit is firmly in place. 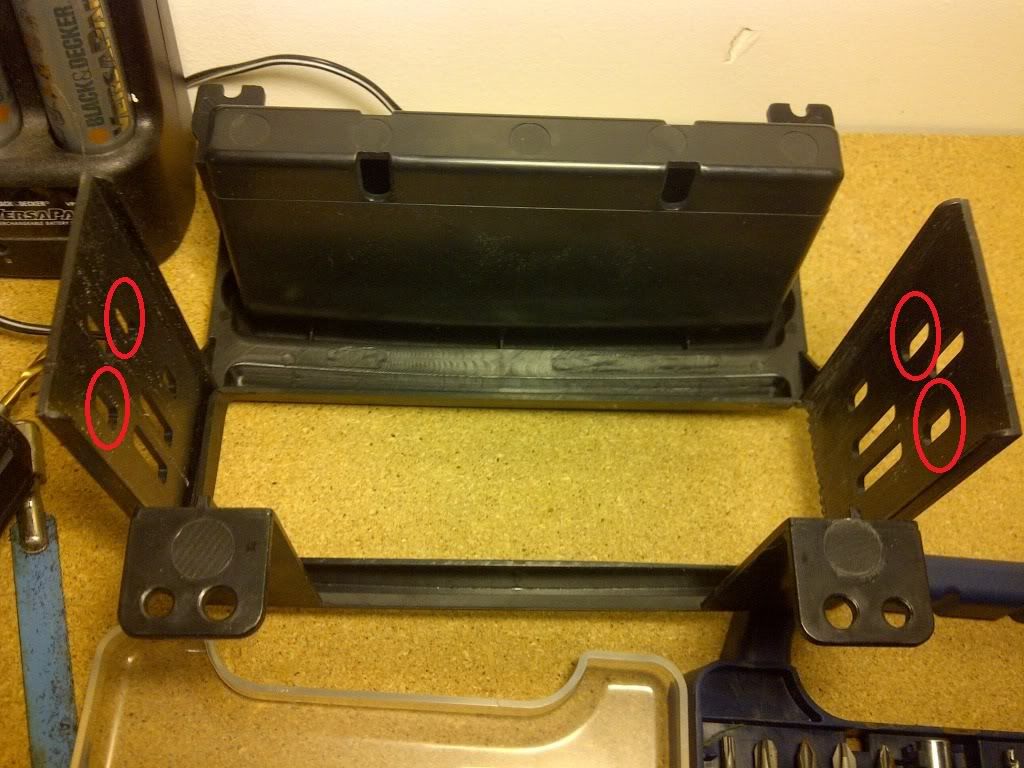 --------------------- This part of the DIY is specific for this model headunit ------------------------------------- So the one major problem I discovered was the single din of this headunit is slightly larger than a standard unit. Well, sort of. It's the right width, the issue is it needs to come out further so the screen can attach to it. Unfortunately the dash kit came with plastic stopping the unit from moving any farther forward. As you can see from the pictures, I ended up having to do some cutting. It's very hard and durable plastic so it took nearly 2 hours to complete. I mainly used a screw driver to drill small holes next to each other and break the bits of plastic off. I finally sanded it down so the unit could come forward. 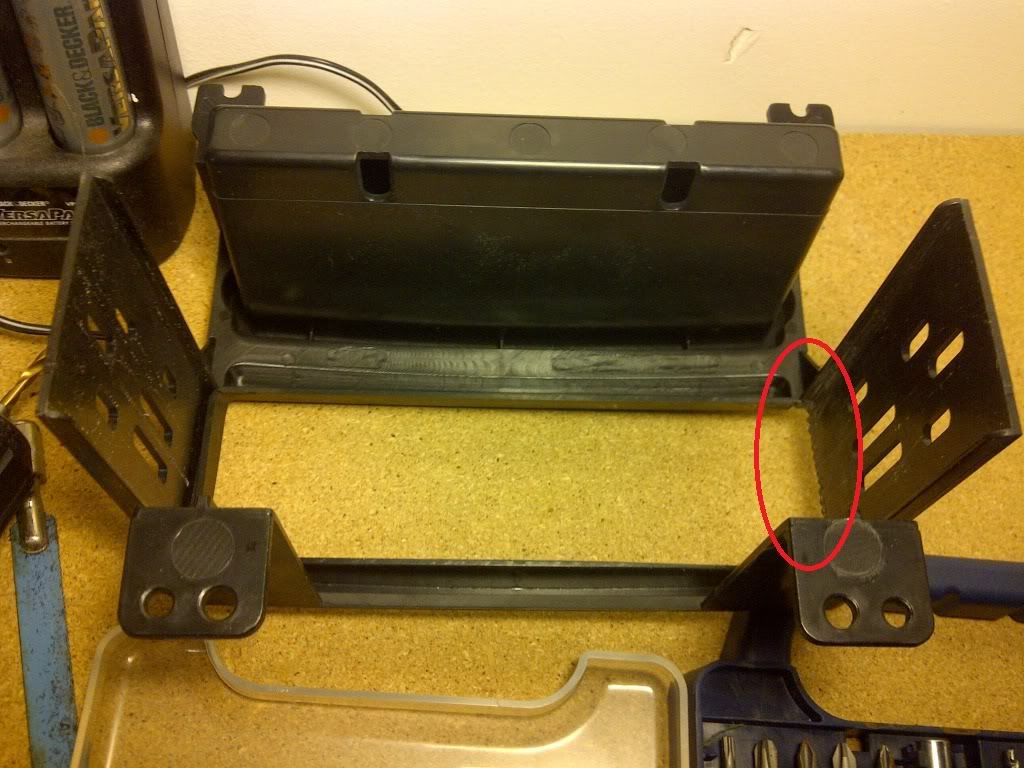 (Before) 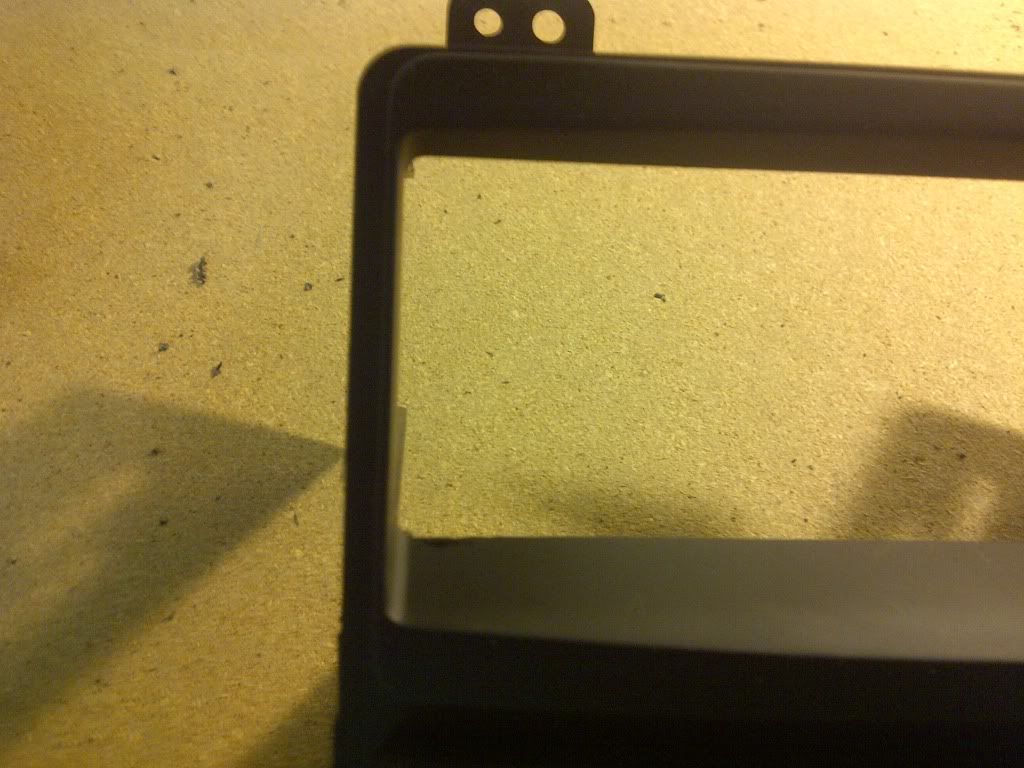 (After) 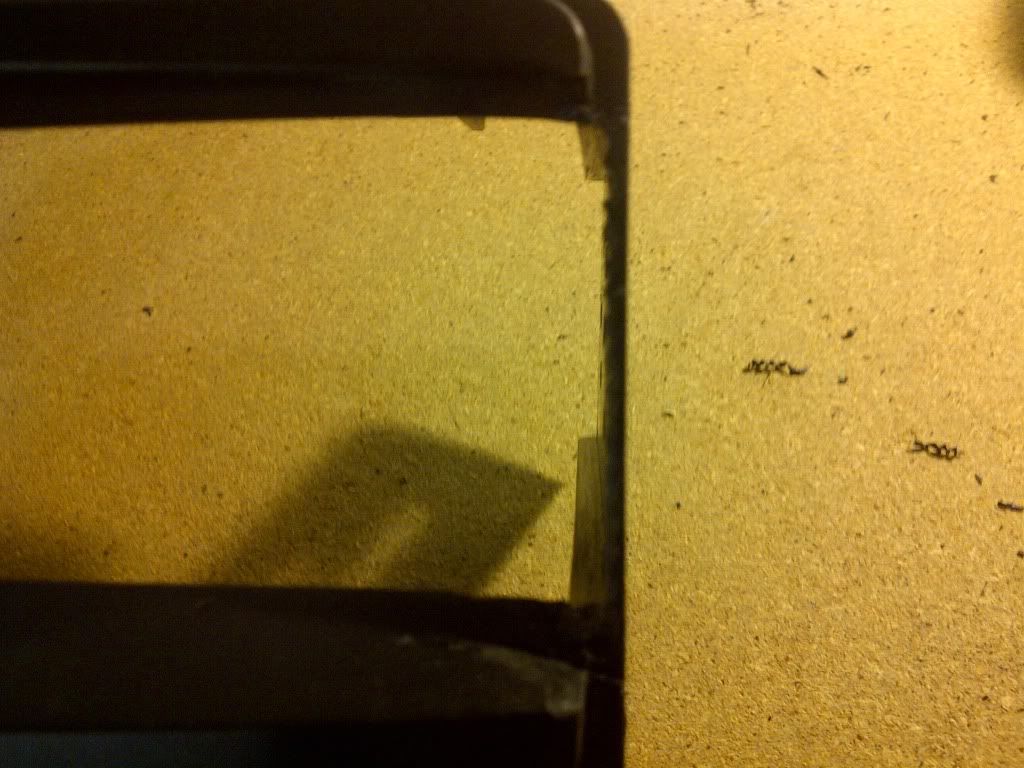 ---------------------------- This ends the cutting section -------------------------------------------------- Once everything is set up with your dash kit, plug your new wire harness into the stock harness. 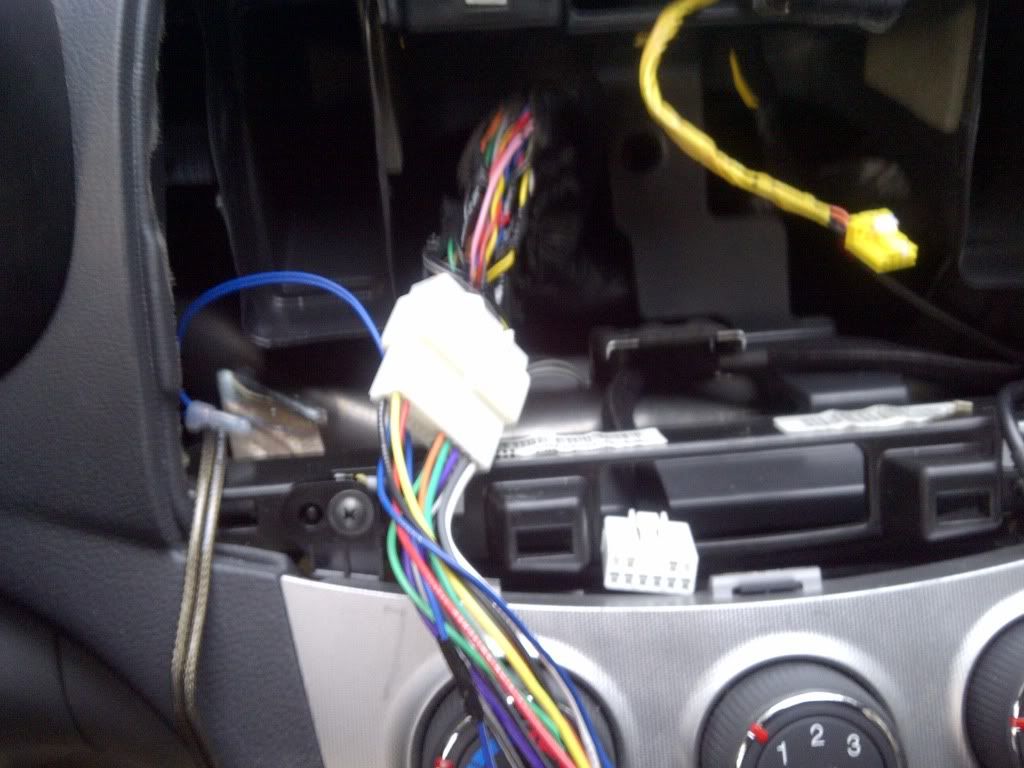 Finally, plug the antenna, amp rca's and harnesses into the headunit. Place the dash kit over the screwholes and attach it to the frame. Finally, plug everything back into your dash piece and snap it back in. Remember to reattach your negative terminal. Test out your headunit to make sure it works. Congrats it's now installed. Here's some finished product pictures: 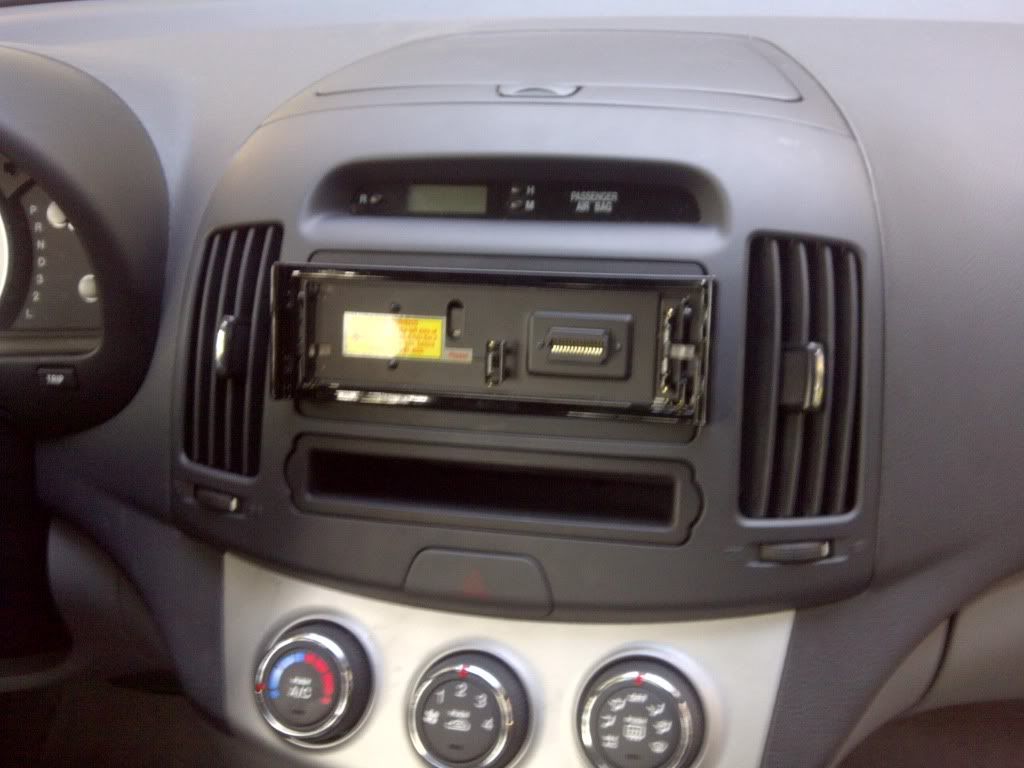 This is how it looks with the touch screen not attached. Very simple and you can clearly see how it is a single din. Does not look very appealing to robbers. 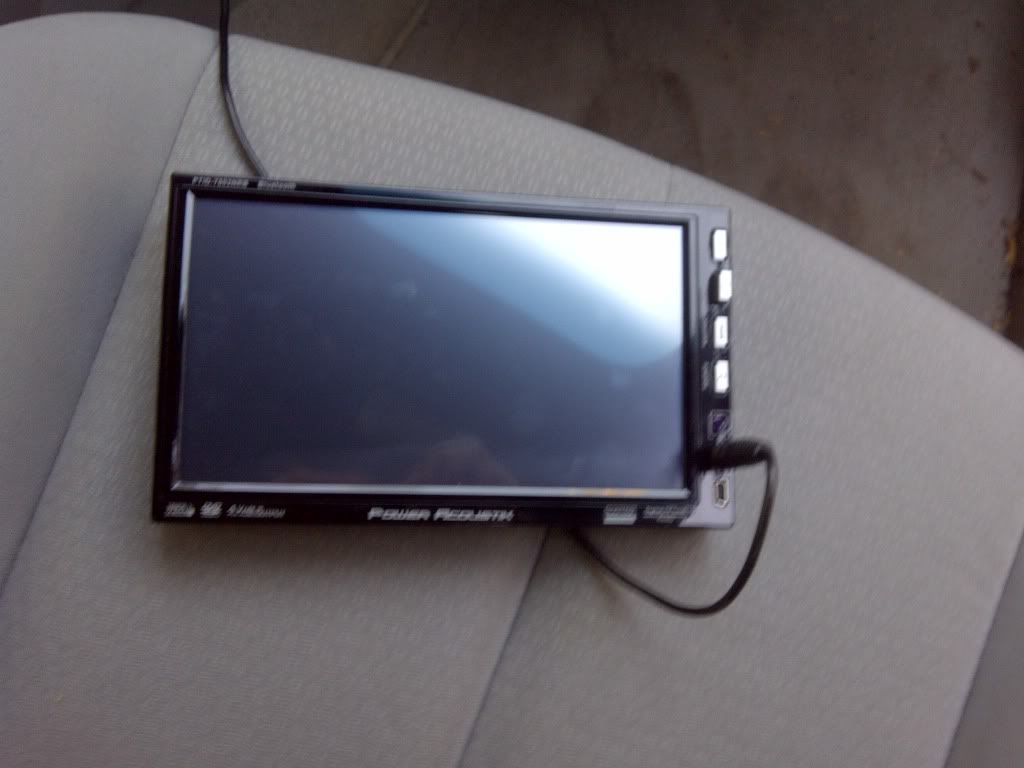 The actual touch screen not attached. (Aux cord is plugged in) 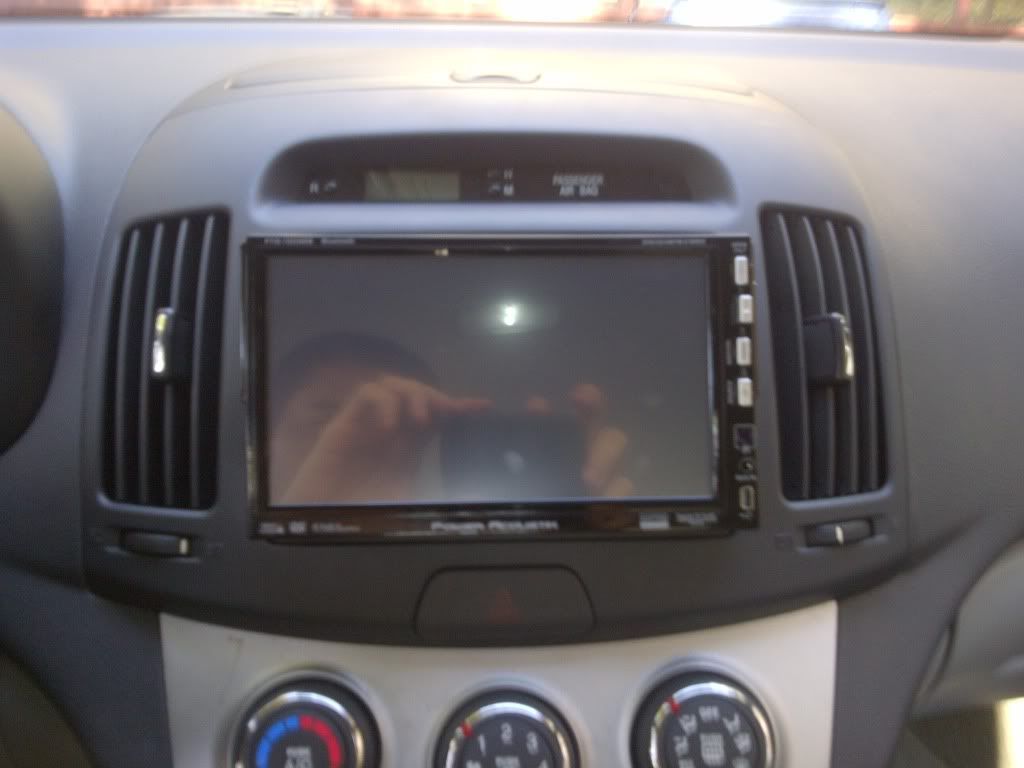  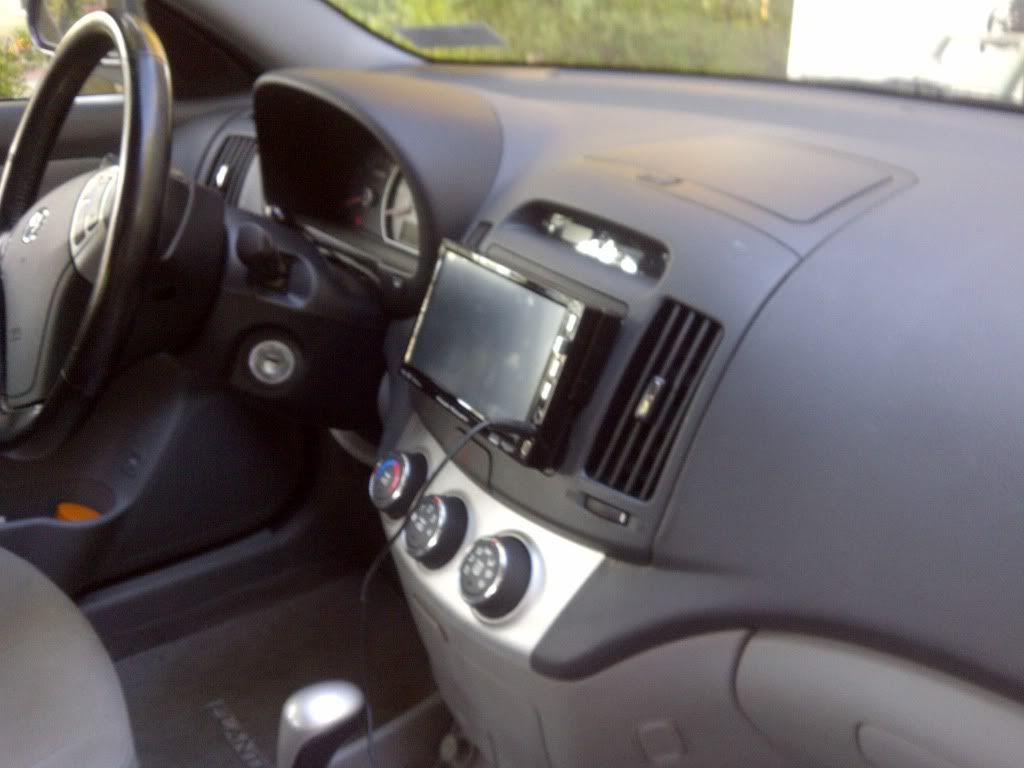 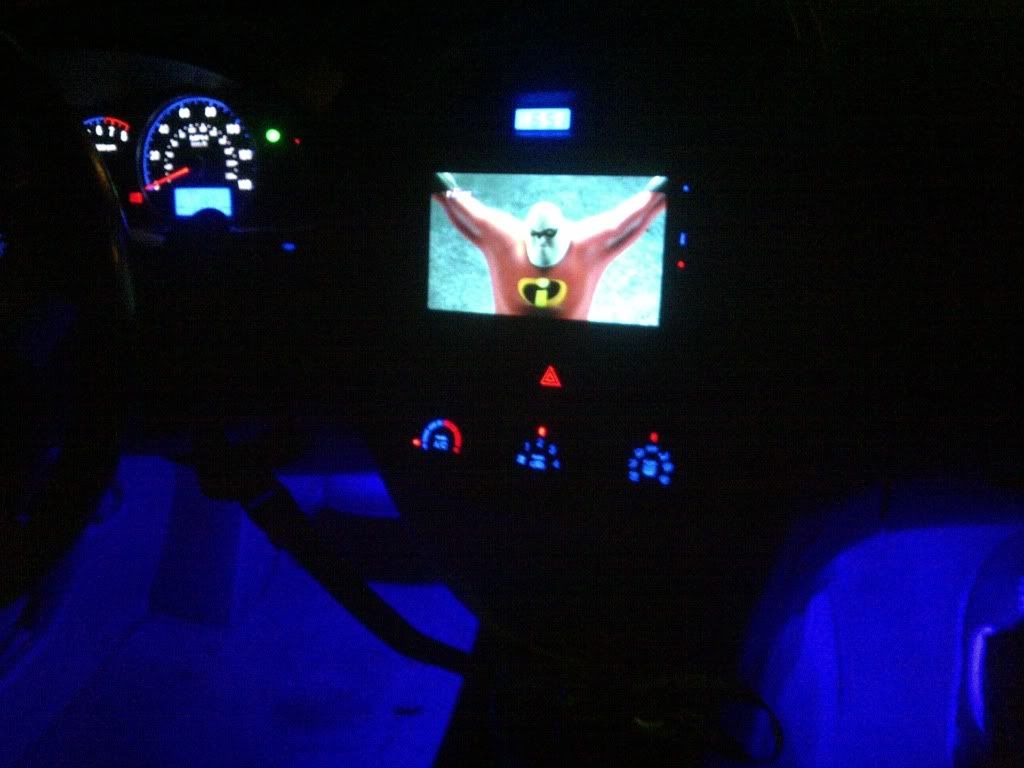 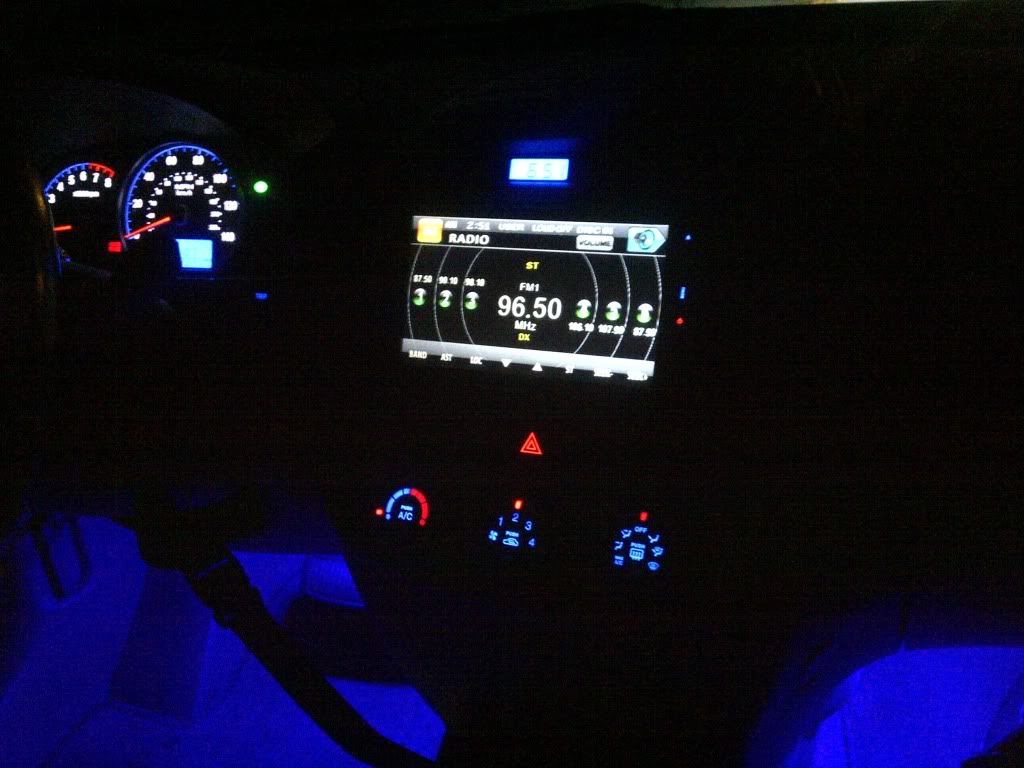 Features: AM/FM Radio CD Player AUX input DVD Player Bluetooth GPS (optional) Steering wheel controls (optional) Internal memory for background pictures iPod ready Multiple RCA inputs and outputs For more features click the link at the top. I hope you guys like it! - Dave Here's a video showing it off along with a few other items: --------------------  2008 Hyundai Elantra SE / Carbon Grey / Incus Body Kit / Sold at 98,400 miles 2011 Hyundai Genesis Coupe Premium / Black / Current DD at 43,000 miles |
 |
 
|


|
Nov 16 2011, 08:20 PM
|
|
 Elantra Guru Group: Leader Posts: 3,309 Posts Per Day: 0.62 Thanks Received: 558 Trader Stats: 0 (0%) Joined: 12-August 09 From: Clinton, MA (USA) Member No.: 7,533 Mood: Evil |
Nice great job!
-------------------- |
|
|
|

|
Nov 16 2011, 08:29 PM
|
|
 '04 Black GT Sedan Group: Lifetimer Posts: 1,659 Posts Per Day: 0.24 Thanks Received: 198 Trader Stats: 6 (100%) Joined: 5-July 05 From: Danville, PA Member No.: 1,092 Mood: Romantic |
Not only a nice job, but great write-up. I'm sure this will help to alleviate some of the worries people might have about replacing their HU!
--------------------  Music Teacher/Geek for life!! |
|
|
|

|
Nov 16 2011, 08:42 PM
|
|
|
Elantra Guru Group: Leader Posts: 3,309 Posts Per Day: 0.62 Thanks Received: 558 Trader Stats: 0 (0%) Joined: 12-August 09 From: Clinton, MA (USA) Member No.: 7,533 Mood: Evil |
The shoutout to ECLUB!!! Sweeeet!
-------------------- |
|
|
|
|
Nov 16 2011, 10:03 PM
|
|
|
Poster Pro Group: Lifetimer Posts: 961 Posts Per Day: 0.21 Thanks Received: 180 Trader Stats: 2 (100%) Joined: 1-September 11 From: Philadelphia, PA Member No.: 11,051 Mood: Full |
Thanks guys! Yea I love it. And it really kicks out the bass. Helluva lot better than just stock
-------------------- 2008 Hyundai Elantra SE / Carbon Grey / Incus Body Kit / Sold at 98,400 miles 2011 Hyundai Genesis Coupe Premium / Black / Current DD at 43,000 miles |
|
|
|
|
Nov 16 2011, 10:55 PM
|
|
 Club Founder Group: Admin Posts: 21,359 Posts Per Day: 3.03 Thanks Received: 2809 Trader Stats: 16 (100%) Joined: 23-December 04 From: Maryland Member No.: 1 Mood: Okay |
I'll be adding this to ElantraWiki and Eclubtube. Great work, Dave.

--------------------  |
|
|
|
|
Nov 17 2011, 12:01 AM
|
|
 Poster Pro Group: Lifetimer Posts: 861 Posts Per Day: 0.18 Thanks Received: 150 Trader Stats: 1 (100%) Joined: 2-May 11 From: USA Member No.: 10,177 Mood: Accomplished |
Good job
--------------------  |
|
|
|
|
Nov 17 2011, 12:56 AM
|
|
 Same sh*t different toliet Group: Lifetimer Posts: 736 Posts Per Day: 0.14 Thanks Received: 86 Trader Stats: 3 (100%) Joined: 18-May 10 From: Worcester, MA Member No.: 8,569 Mood: Busy |
looks great, perfect write up & wonderfull product for the value.
-------------------- 2010 Elantra GLS (Regatta Blue/tan cloth)
2007 Jeep Compass Limited 4WD(black-tan leather) |
|
|
|
|
Nov 17 2011, 08:55 AM
|
|
 Post Maniac Group: Lifetimer Posts: 1,746 Posts Per Day: 0.29 Thanks Received: 57 Trader Stats: 0 (0%) Joined: 24-August 07 From: North White Plains, NY Member No.: 4,755 Mood: Accomplished |
Awesome work and write up

-------------------- EC ROCKS! Show your support, ask/answer questions, start topics, post pictures, and donate!! Woots!
 |
|
|
|
|
Nov 17 2011, 02:13 PM
|
|
 CarPuter Masta! Group: Lifetimer Posts: 6,363 Posts Per Day: 1.04 Thanks Received: 130 Trader Stats: 11 (100%) Joined: 23-June 07 From: Toronto, Canada Member No.: 4,300 Mood: Relaxed |
awesome!
Its pretty sweet that it's a removable full screen. They do make Double-DIN dash bezels though - Canadian spec --------------------    carPC Build Thread | My Elantra Site | My Fiero Site | My WebSite | Donate here to keep ElantraClub online and growing. |
|
|
|
|
Nov 17 2011, 09:52 PM
|
|
|
Poster Pro Group: Lifetimer Posts: 961 Posts Per Day: 0.21 Thanks Received: 180 Trader Stats: 2 (100%) Joined: 1-September 11 From: Philadelphia, PA Member No.: 11,051 Mood: Full |
QUOTE (sarge @ Nov 17 2011, 02:13 PM)  Its pretty sweet that it's a removable full screen. They do make Double-DIN dash bezels though - Canadian spec Yea I know they do but I didn't feel like having to try and hunt down one of the Canadian specs for whatever extra that would cost. Plus I was afraid I may run into some fitment or plug problems if I did that. Also, double din stereos are much more expensive than I would have been able to afford so this definitely worked out in the end for me. Thanks guys I appreciate the comments! -------------------- 2008 Hyundai Elantra SE / Carbon Grey / Incus Body Kit / Sold at 98,400 miles 2011 Hyundai Genesis Coupe Premium / Black / Current DD at 43,000 miles |
|
|
|
|
Nov 18 2011, 07:02 AM
|
|
 Post Maniac Group: Lifetimer Posts: 1,916 Posts Per Day: 0.41 Thanks Received: 268 Trader Stats: 1 (100%) Joined: 11-July 11 Member No.: 10,696 Mood: Numb |

-------------------- A proud member of the club.
|
|
|
|
|
1 user(s) are reading this topic (1 guests and 0 anonymous Users)
0 Members:


![]() Similar Topics
Similar Topics
| Topic | Replies | Topic Starter | Views | Last Action | |
|---|---|---|---|---|---|
 |
New garage door opener | 8 | Blupupher | 1,755 | 18th May 2017 - 07:08 PM Last post by: Blupupher |
|
 New Wheels! New Wheels! |
6 | Sakie8015 | 67,561 | 2nd March 2017 - 06:38 PM Last post by: bhorste |
|
Newbie '17 ECO First time Elantra owner |
3 | Kuritan | 58,022 | 28th January 2017 - 10:20 PM Last post by: rstnick |
|
New from the great white North! | 3 | ElantraQc | 17,032 | 28th January 2017 - 10:07 PM Last post by: rstnick |
|
My 2017 AD Elantra RS (Yes RS) :)- | 4 | billy4u | 66,822 | 26th January 2017 - 09:16 PM Last post by: elantragt |
Copyright 2022 The Elantra Club  |
Time is now: 19th April 2024 - 03:13 AM |
Elantra Club is not affiliated in any way with Hyundai Motor America |