Repair : Overdrive / 4TH gear loss or slipping
no CEL or PO734 , P1624 codes stored
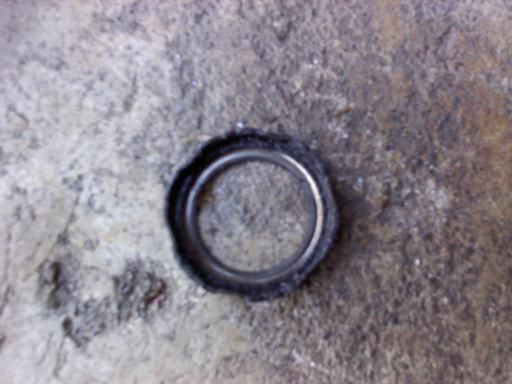
If you have recently lost overdrive , overdrive is slipping and or transmission is falling back into third gear erratically you may be able to repair it using this guide , You do not have to remove transmission . First check for codes ( major parts stores will check for free if don't have a scanner ) even if no CEL is displayed. If code(s)P0734 - ( If the value resulting from dividing the PG-A output (Input shaft rotation speed) by the 4th gear ratio does not match the PG-B output (output shaft rotation speed) after 3rd gear is engaged, DTC P0734 is output . ) and sometimes P1624 - ( MIL-On request from TCM ) are stored there is a good chance of Overdrive Hub (Front) Bearing failure. There is a outside chance one of the pulse generators has failed but you would most likely have code P0717 or P0722 ( pulse generator "open " Codes ) . The best way to find out is to drain the fluid , remove pan and look for pieces of the bearing on the magnets and in the filter . You can follow this guide - Changing the automatic trans fluid and filter on the HD and FD if need be to drain fluid and remove pan & filter . Here is pictures of the pieces I found in my pan and filter .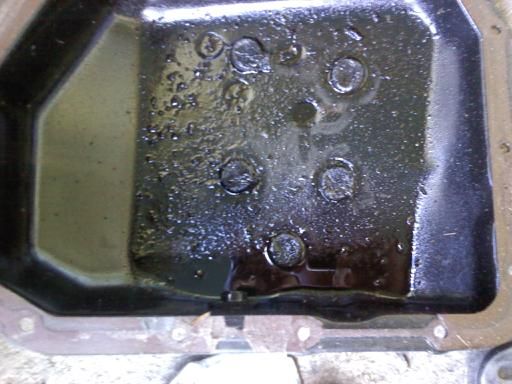
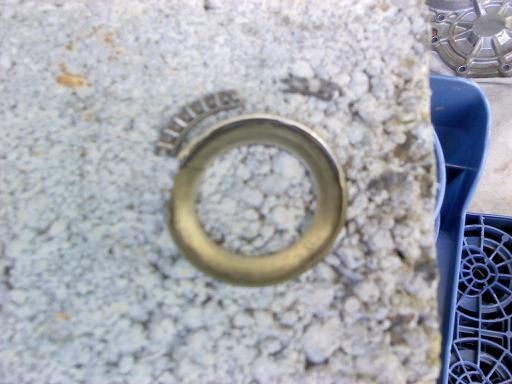
Sometimes you wont find a complete piece like I did ( 2nd pic ) but there will be enough on the magnets to indicate bearing failure.
The next step will be gaining access to the rear cover to remove it. Start by removing drivers side wheel and splash guard ( 10mm bolts ) . Next remove the airbox ( 10mm ), battery and battery tray ( 12 mm ). Now the transmission mounts will need to be removed and the transmission lowered to gain full access to rear cover requiring a engine support fixture ( See picture below ) , you can fabricate one or follow instructions below picture .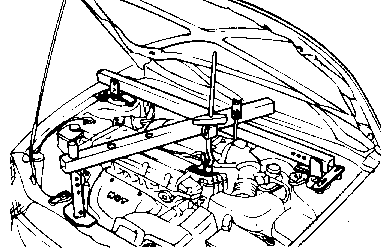
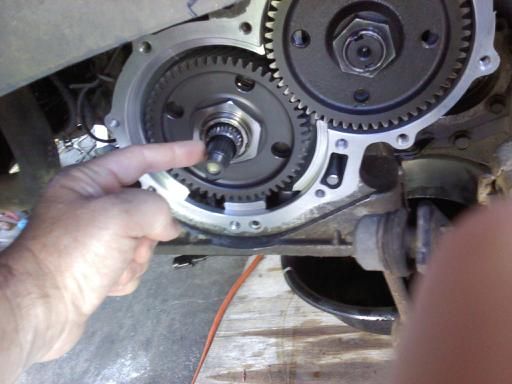
I used a floor jack and jack stand to support the engine/trans axle , If you go this route be very careful and be sure everything is secure before staring work . Place the floor jack under the cross member and raise it just enough to to take the weight off the drivers side mounts through bolt . Remove the 4 ( 17mm ) cross member bolts ( 2 front , 2 rear ) and the drivers side mount through bolt ( 17mm ) . Now carefully lower the transmission until the top of the rear cover is visible from the drivers side wheel well. Go slow and remember you can lower it more if need be to get the rear cover off. Now place the jack stand somewhere where it will be solid , either at the differential , cross member or under the oil pan using a block of wood to prevent damage ( what I did but not the best place ). A important side note : If your flex pipe is old , leaking at all or you just want to be safe remove it . I didn't and my very small leak became huge , I had to replace it ( Flex pipe install , to remove and install ) so be careful . Remove Pulse generator (1 10mm bolt ).
Now remove the 12 ( 12mm ) rear cover bolts and carefully remove the rear cover . It may be stuck pretty good , gently tap ( there are a couple spots you can get to to tap it ) and or pry it off. Here is a picture ( not mine , I found it to use as reference since I forgot to take one at this stage ) of the cover removed , this may give you a idea about how far to lower the trans axle . Take note of the o ring at the bottom , make sure it is in place and not covered with sealant when you place the cover back on .![]()
Now gently slide the OD drum out , the hub may slide out of the drum but that is ok .You may find the bearing race or part of the bearing stuck to the hub . Inspect everything for damage , be sure the retainers holding the clutch pack together are in good shape. 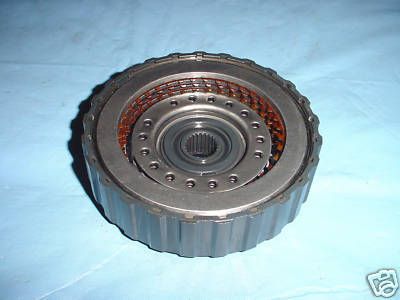
You can remove the retainers and check the clutches and steels for wear if you want but be careful. If the top steel , hub and drum look good ( no groves or scars ) it is most likely OK. Also insure the part of the hub where the bearing goes is smooth . There is a small metal clad seal in the drum , I strongly suggest changing it as fluid pressure can be lost . 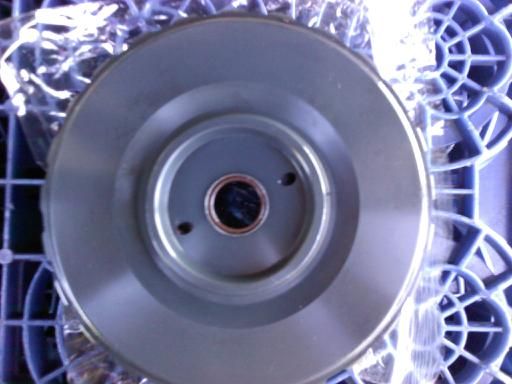
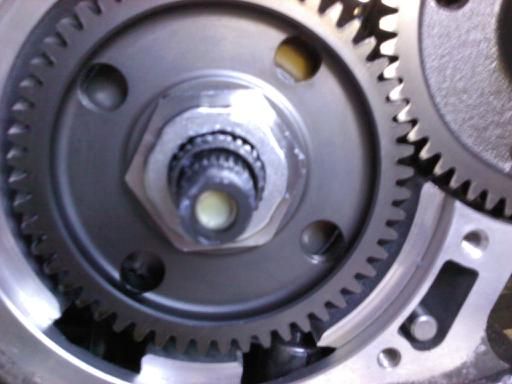
Now slide the "cupped" race off of the nut and remove the output / quill shaft.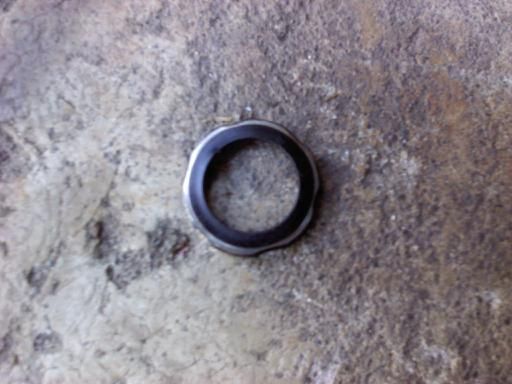
Inspect the output / quill shaft for damage / groves in the splines . Most likely there will be small " nicks " in the splines but they will be OK . There is a bushing inside the shaft , check for wear . I replaced it because it comes with the kit but you can use your own judgement .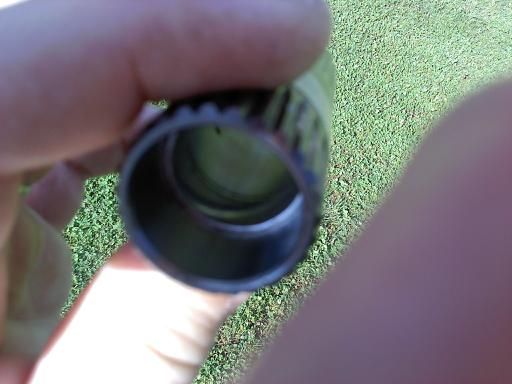
Clean the transmission case removing old seal / Gasket .Clean the cover and check for wear or groves. Check the bearing as well for free movement .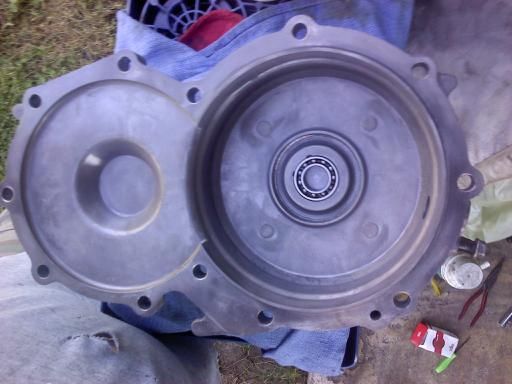
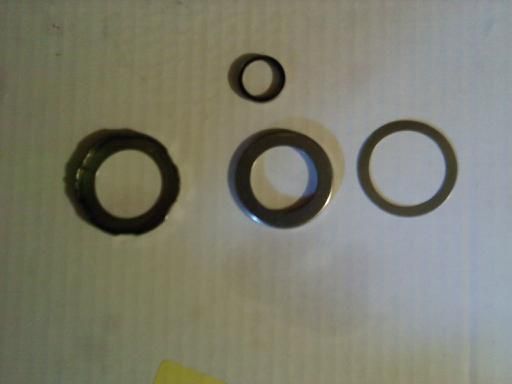
Now some info about the parts. I checked with the dealer and all they could order was the bearing ( Part Number 4552522800 Part Name BEARING-ATA END CLUTCH - $19.48 ) but there was no picture to be sure it was correct . I ordered from Whatever It Takes Transmission ( WITT? ) , here is a list of the parts .
42220LK Kit, A4BF1/A4BF2/A4AF3 Overdrive Hub(Front) (Contains: D42220L, 42220LA, 42056E)" ;Cupped race , bearing , .015 Shim To Correct Inplay , quill / output shaft bushing $16.79
42083E OD DRUM REAR METAL CLAD SEAL $2.25
42300LAF Farpak Gasket $2.38
A42010LA FILTER $3.64
Total with shipping and COD was $47.03 You can avoid COD by calling and placing order . There are other sites to order from as well but they had everything in stock except the seal but it arrived from another warehouse , no extra shipping charge .
If you do have a damaged shaft or drum they have them but I'm not sure of part # or price.
Here is pictures of the new parts ;
Reassembly : The quill / output shaft bushing can be pried out but the new bushing is thicker ( lack of wear ) and has to be pressed in . I used a vice and 2 pieces of oak to press the new one in . A socket will help push it in to the lip . After cleaning place the new Cupped race over the lip against the large nut using Vaseline to hold it in place. Now coat the inside of the quill / output shaft with Vaseline and slide it into place . It should be nice and snug with the new bushing , little to no play .![]()
Pry the old metal clad seal from the drum and peck the new one in .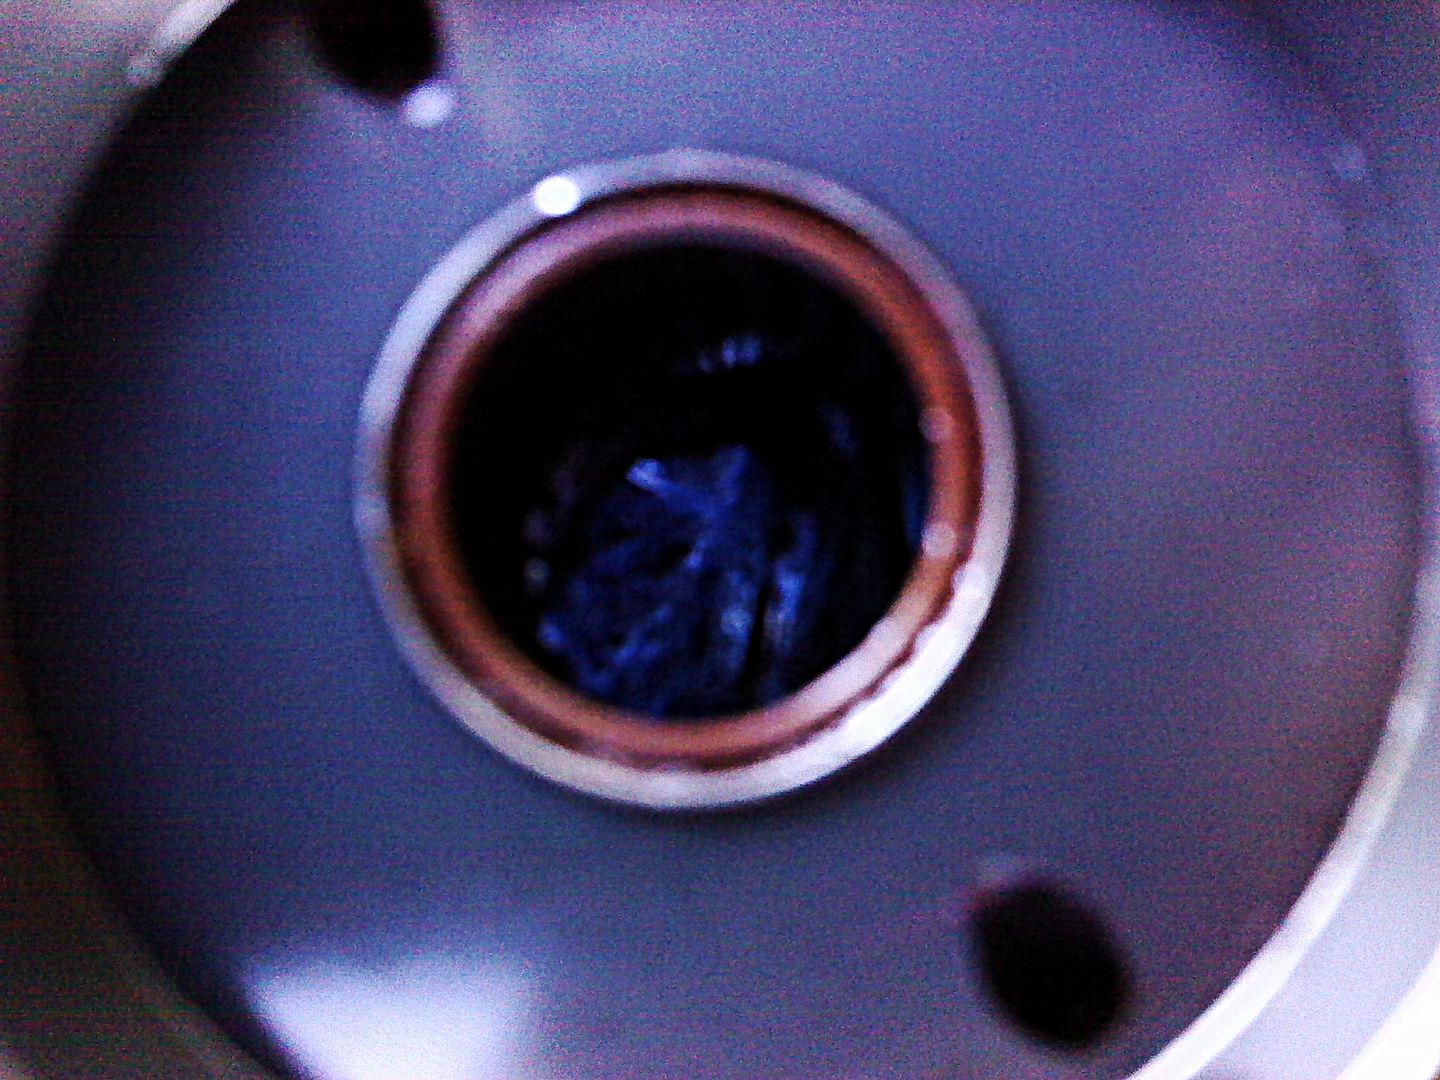
Now place the new bearing on the hub , bearings up .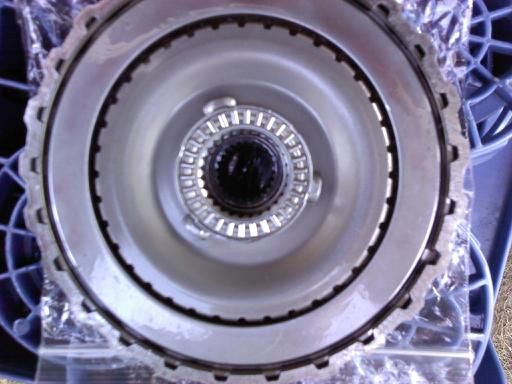
Use Vaseline to hold it and lube it . I debated using the .015 Shim and after checking clearance several times I elected to . Place it on top of the bearing .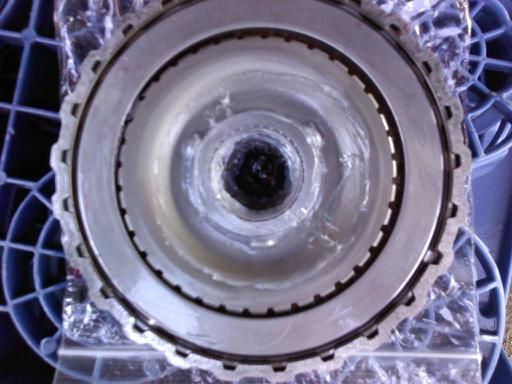
Now slide the hub / drum back into place on the shaft , use a bit of Vaseline to help the seal slide on .
Use Gray gasket maker to reseal the cover . Apply a bit of Vaseline to the bearing in the cover and the surrounding area , There is a clip on the drum that pops into a lip inside the cover.
TIGHTENING TORQUE : Rear cover 14-16 lb·ft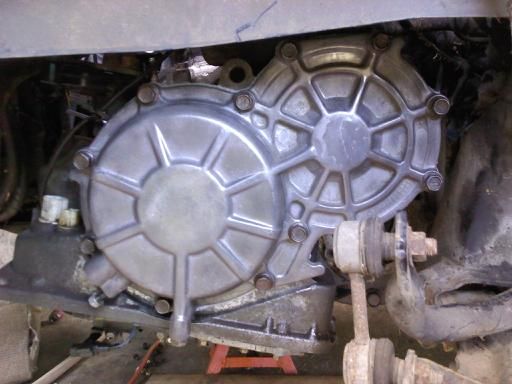
Install Pulse generator . Slowly jack trans axle back into place and reinstall cross member , top mount , battery tray , battery and air box . Reinstall splash shield and wheel .Replace filter and gasket /pan using linked guide . Remember to use SPIII.
I did this repair on my A4BF2 Automatic Transmission . There are many Hyundai Transmissions this will also apply to , here is a list of the ones I have found thus far ; A4BF1/A4BF2/A4BF3 /A4AF3 .There are more . Please feel free to add to list . Here is a exploded view of the area where the repair will be. 
Here is a complete exploded view of the transmission , similar ones can be found using your choice of search engine to be sure your transmission is similar in design .
I hope this helps someone , it saved me quiet a bit of money . My original transmission had been driven for a long time needing this repair and with the wrong fluid . Large pieces of the clutch retainer(s) worked their way throughout the trans axle making a complete rebuild questionable . I bought a used A4BF2 transmission ( good price , no warranty ) and when I checked the pan sure enough the bearing had came apart . Thank God it was repairable . The sooner you find you have bearing failure the better the chances it can be repaired fairly cheap with a bit of work . If anyone has anything to add please do , especially corrections . If you have any questions I will do my best to help ,Thanks for reading - Ted .
ibWiki copyright © CJVJ
Invision Power Board (http://www.invisionboard.com)
© Invision Power Services (http://www.invisionpower.com)